Transforming a jar into a DIY Soap Dispenser

Posted August 23, 2023 by: Admin
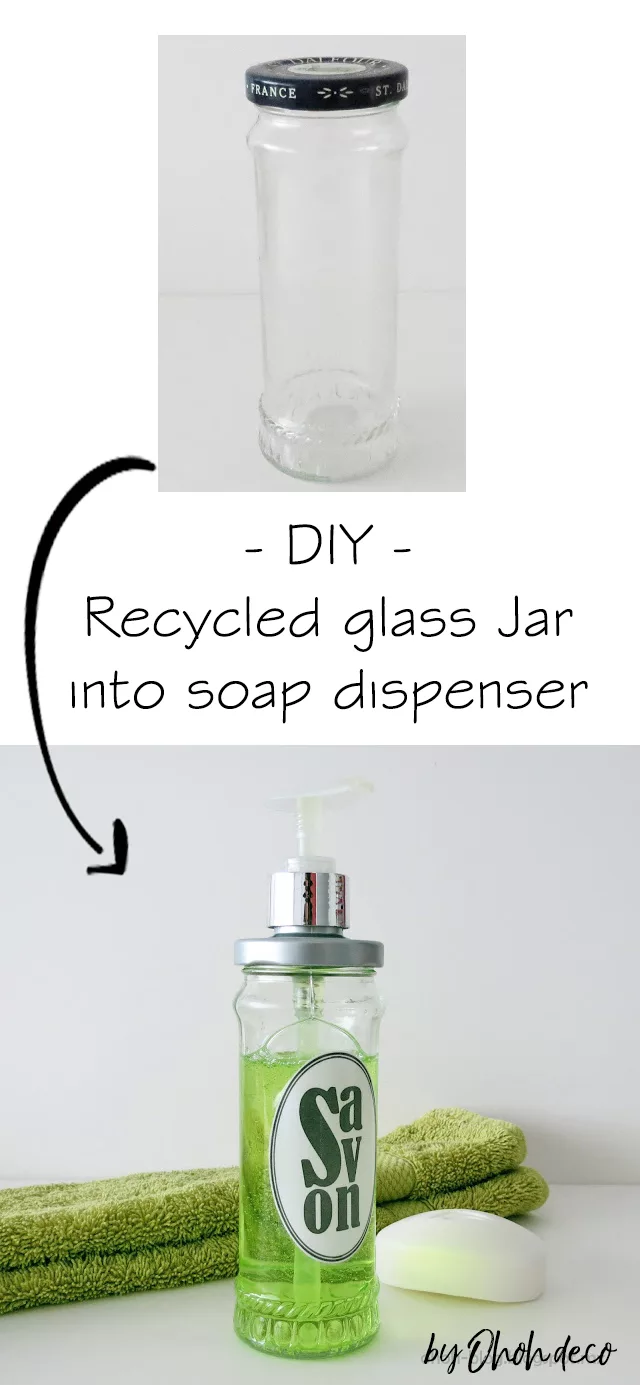
I usually keep containers and jars because I find them useful. That’s why I’m always searching for a good upcycling craft idea to use them. Using a glass jar to create a soap dispenser is a simple, beautiful, and sustainable solution. Can we ask for more?
To create this DIY project, you will need:
- A glass jar with a lid
- A soap dispenser pump
- A cutter
- All purpose glue
I usually keep containers and jars because I find them useful. So I’m always searching for a good idea to recycle them or use them in a craft. Making a soap dispenser with a glass jar is simple, beautiful, and eco-friendly. Can’t we ask for more?
To create this craft, you will need:
- A glass jar with a lid
- A soap dispenser pump
- A cutter
- All purpose glue

Creating this soap dispenser is very easy. Let me explain how I did it.
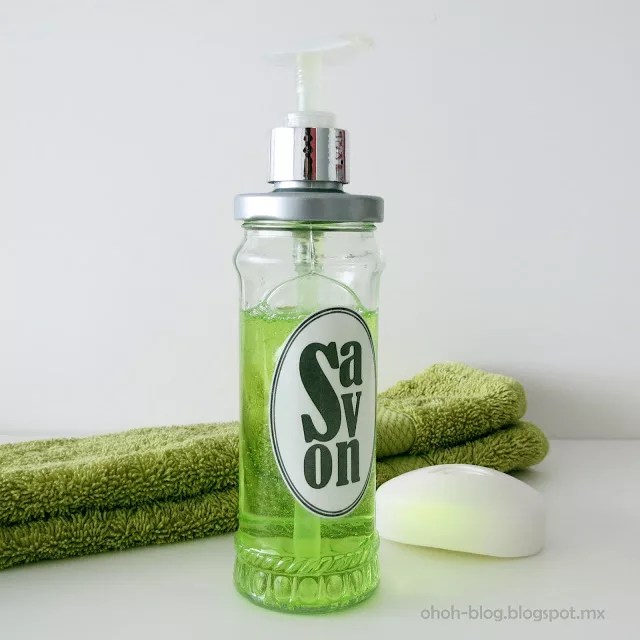
I used a jam jar and made a hole in the lid with a cutter. The hole should be slightly smaller than the base of the soap pump. I spray painted the lid silver, but you can choose any color you like.
Once the paint was dry, I inserted the soap pump through the hole and glued the base to the lid. Then, I waited for the glue to dry. I filled the jar with soap and screwed on the lid. And that’s it!
I also added a cute label. It looks very adorable, don’t you think? I’ll have to eat more jam to save more jars!
I have more craft ideas for upcycling mason jars, such as personalizing mason jar lids and creating a modern vase.
Creating this soap dispenser is really simple. Let me explain how I did it.
I used a jam jar and made a hole in the lid with a cutter. The hole should be slightly smaller than the base of the soap pump. I spray painted the lid silver, but you can choose any color you like.
Once the paint was dry, I inserted the soap pump through the hole and glued the base to the lid. Then, I waited for the glue to dry. I filled the jar with soap and put the lid back on. And that’s it!
I also added a nice label.
It looks pretty cool, don’t you think? I’ll have to eat more jam to save more jars!
Want to save this “handmade upcycled bottle in soap dispenser” idea? Save it to your favorite Pinterest board!